Feeds:
Posts
Comments

Archive for the ‘crafting’ Category

20130418-190812.jpg

My Daughter with her New Glow-in-the-Dark Necklace

Glow-in-the-dark Necklace

made from the $.25 Machine

inspired by a project in the magazine Family Fun

Tools:

  • an awl or nail to piece a hole
  • 2 feet of kite string or some other type of yarn
  • at least 4 glow-in-the-dark beads, to make it glow-in-the-dark, but any kind of bead or button will do.  We used perler beads
  • $.25 machine plastic container

Directions:

  1. Take purchase a little toy for $.25 at the grocery store, but make sure it comes in one of those little plastic containers.
  2. Remove the toy.
  3. Using an awl or some other sharp tool like a nail, pierce a whole through the top of the container.
  4. Cut a piece of string about 2 feet long.  You can always trim it when you’re done.
  5. Thread a bead or a button into the middle of the string.  Knot the string several times just above the bead.
  6. Put one end of the string next to the otherand thread it through the underside of the hole.  This way, the bead will keep the string in place.

    20130418-190756.jpg

    Strung Bottom Bead

  7. Place charms or other beads along each side of the string.
  8. When you’re ready, tie the two ends of the string together in a knot.
  9. Fill the container with whatever excites your child, i.e. glow-in-the-dark beads, bugs, snack, etc.  We filled our with glow-in-the-dark beads, so that the necklace will glow-in-the-dark!
  10. Place the necklace around your child’s neck.
20130418-190821.jpg

Our Glow-in-the-Dark Necklace

Read Full Post »

Fridgigears

20130405-210524.jpg

Playing with Newly Acquired Fridgigear!

It was one of the first beautiful, warm, and sunny days outside, so why I ventured to the basement to find this newly acquired toy from a swap, I have NO idea!!  We still did make it outside to play.  I guess I was super excited about this toy myself.  (A good sign in my opinion).

Nevertheless, this fridgigear toy is made up of magnetic gears that double as a puzzle.  It also comes with one gear that’s a motor to operate the gears.  It was a good hour of GLUTEN-FREE entertainment!  Not only did we experiment with the gears, but the next level of fun was rearranging the puzzle pieces to form newly colored gears.

20130405-210532.jpg

Rearranging the Puzzle Pieces to form New Gears

After much searching, I have been unable to find the puzzle gears.  I have found fridgigears that glow in the dark and double as a picture frame, but no puzzle pieces.  I still highly recommend this toy as great entertainment in the kitchen while you’re cooking!

I just bought some extra sets for presents.  I found an AMAZING deal at www.scientificsonline.com for $19, and you can get another 12% off if you use the code TY2.  It’s also free shipping if you choose the slower route.

Let me know if you’ve come across other types of refrigerator fun that you love!

Read Full Post »

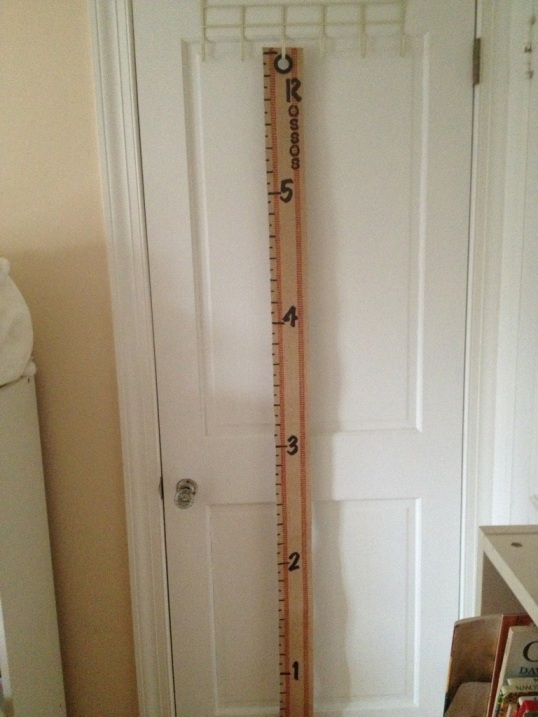
20130225-210548.jpg

Finished Growth Chart

I LOVE to craft and especially for my friends who have just had babies.

My criteria for making things:

1. It needs to be useful
2. It needs to be something that will be used for more than just a few months
3. It needs to be personal

I decided that I wanted to make something I’d never made before.  So, after doing lots of research, I came across this amazing growth chart from Whipperberry.com, in which the height is pinned on by tags (not featured in the picture above).

The instructions were not as clear as I would have likes, and finding the supplies definitely proved more challenging.  This is what I did and what I’ve learned:

DIY Jute Growth Chart

Supplies:

20130225-210612.jpg

– *Jute (burlap) webbing (it’s about 3.5″ wide), at least 6.5 ft long = 78″ long = about 2.5 – 3 yds if wanting to make the numbers up to 6 ft (.85/yd)
– tape measure (or ruler)
– tape (if using tape measuring to hold it next to chart
– *black shower curtain grommet (1″ in diameter for pack of 8) – from Hobby Lobby 6.99

3 1/4" Round Glass Jar with Flip Lid

3 1/4″ Round Glass Jar with Flip Lid

1" Matte Black Curtain Grommets

1″ Matte Black Curtain Grommets

– hammer (to secure grommet)
– sharp scissors (to cut hole for grommet)
– 1 fine point black sharpie (came in 2 pack for about 2.99)
– 1 ultra fine point black sharpie (came in pack of 2 for 3.99)
– *1 set of stencils with letters and numbers (mine were 2″ sized by C-Thru Better Letter in the “Marker” font) – I got mine at Michael’s, but can’t find them online.  I also recommend getting a smaller size as well.  Hobby Lobby has some fun ones and you can sort by size of the stencil.
– *key tags (from hardware or office supply store) – I used 1/2 the box (7.79 for 50 tags)

20130225-210524.jpg

Book Box

– *extra large safety pins (from craft supply store, the brand I got was care & repair) – about 2.99 for 50
– *3 1/4″ Round Glass Jar with Flip Lid – from Hobby Lobby 1.99
– *box to put finished chart in – I found these cute book boxes at Michael’s (8.99, which I got for 6.29 on sale)

Total Cost*: $34.25 (the items are an investment, but once you have them, then you don’t have to purchase many of them again.

Price of items per chart (dividing everything into individual items): $22.75

Directions:

1. Layout jute and use measuring tape to cut to length you want.  My first one was too short at just 6′, so I would cute it to 6.5 ft or  about 78 inches.

2. Put your grommet in next by lining it up in the center at the top and tracing around it.  I found that I kept having to make my whole a bit wider than I thought.

3. Cut out the hole with your scissors.

4.  Place front and back of grommet around hole.  I tried to use a hammer to get them to snap into place, but I actually found that I had to stand on it with my heel.

20130225-210618.jpg

Measuring Tape Taped to Chart

5. Line up your measuring tape along the side of the jute.  I used clear tape to tape it into place.

6. With my ultra fine point marker, I started by marking all the feet first (i.e. at 12″, 24″, 36″, etc.).  I made about an inch long horizontal line across and it’s about 1/8″ thick.  I did an outline of the rectangle and went back later to fill it in.

7. Then, I used my ultra fine point marker to make small (about 1/4 inch long)  horizontal lines at all the odd numbered inches, starting at 1,3,5, etc., and I made about 1/2 inch long lines at the even numbers.  The even numbered line with all the way to the red stripes.  Again, about 1/8″ thick.

8.  I went back to shade in all the marks with the thicker of the sharpies.

9. Then, I used my stencils and lined them up at the foot marks.  I used my ultra fine sharpie to trace it and the thicker one to fill them in.

10.  Finally, I chose to put the family’s last name on the chart so that both boys could use it.  That was a bit trickier, because I realized I was running out of room between the 6th and 5th foot.  Another reason to make your chart longer so the grommet doesn’t interfere.  I used my stencils with the ultra fine marker to trace the letters and then I filled them in with the thicker one.  I also noticed that I couldn’t use large letters the whole way down, because I was running out of room.  I had to use smaller stencils. 
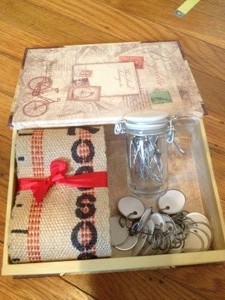
20130225-210531.jpg

Completed Chart Package

11.  When I was done, I flipped it over on the back to write a personal message.

20130225-210540.jpg

Personal Message on Back of Chart

Please tell me what kinds of creative additions you made to your chart or anything you learned while making it!

Read Full Post »

20130315-175915.jpg

Klehr Dough and Supplies

It was another cold and blustery day here in Philly.  Terribly bone chilling, that I just couldn’t force myself to take my daughter outside.  We called over a friend, and I decided to make some gluten-free play dough.  Well, of course, I was somehow out of rice flour, but found Pamela’s gf flour blend that was past its prime, and decided to try it out.  (Normally I would never use an expensive gf flour blend, but this seemed totally worth not wasting!)  The best part was that my daughter asked if she could eat it, and I made food-grade play dough, so yes, it’s totally edible!

*BIRTHDAY IDEA*:  We made this as give-aways for my daughter’s 3rd birthday.  We bought little containers at the dollar store, and each child got to add colored glitter of choice to his/her container.

When playing with our play dough, we bring out all sorts of utensils from both her kitchen and mine, along with cookie cutters, and b-day candles.  It really adds to the fun!  Tell me what you like to use with your play dough.

Gluten-Free Play Dough Recipe

The Recipe is adapted from Kids with Food Allergies Foundation

Serving Size: 1 batch = will fill a 16 oz container. A double batch will fill a 32 oz yogurt container.

Ingredients:

zqb-30891b_1z

India Tree All-Natural Food Dye

– 1+1/4 cup of rice flour or gf flour blend (I have done both and come out great!)
– 1/2 cup of salt (I used Himalayan salt, and it turned the dough a light pink)
– 2 tsp cream of tartar
– 1 cup water
– 1 tbsp oil
– 1/4 tsp gf vanilla (I use frontier vanilla flavor, so there’s no alcohol involved)
– glitter or sparkles (optional)
– food coloring (optional) – I like to use all natural (GF) food coloring from India Tree

Supplies:

– large pot
– mixing spoon or spatula
– measuring cups and spoons
– airtight container to put play dough in
– cookie cutters (optional)
– b-day candles (optional)

Directions:

1. Mix dry ingredients in large pot first: flour, salt, cream of tartar
2. Add water and oil and mix
3. Heat over the stove top at a medium heat.
4. Stir constantly for about 5 minutes, until mixture pulls away from sides.
5. Add vanilla and mix thoroughly.*
6. When cool, place in air tight container. (We like to reuse old yogurt containers.)

*Options:
1. You can add food coloring to the water before you stir it in.  You can always add it after you’ve made the dough, but it will stain your hands.
2. You can add sparkles or glitter to the batch once its made.

Read Full Post »

My Little Family

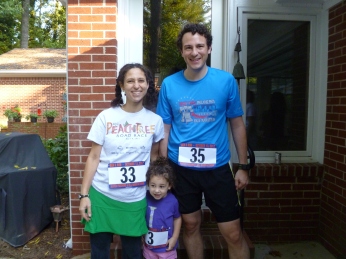
I had been planning this day for many, many months. As my husband, a non-athlete, took up running almost 2 years ago, I never thought he would stick with it, and as it turns out, he just completed the Philly Marathon less than a week ago. I am so incredibly proud of him and honored to know him, that I had to come up with a way to support his dedication and honor his perseverance . . . A surprise 35th (gluten-free) birthday party with a running theme!
If there’s anything to know about me, it’s that I LOVE surprises, and I LOVE themes. So, with my dad’s help, it all began.
The theme: a 3.5 mile run for my husband’s 35th birthday. His last name starting with a K, the race was titled:

The BEN K 3.5 mile Run

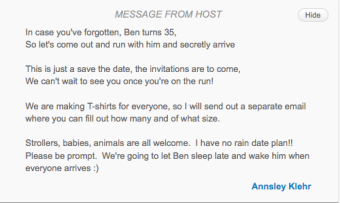
1. We sent out Evites

Invitation

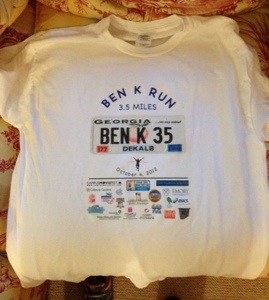
2. We began designing our race shirts. We first designed them with photoshop and then ironed on each one. I ordered iron-on transfers in bulk from amazon.com (18 for around $18) and the shirts from http://www.shirtsupplier.com (around $2/shirt). Since my husband is from Atlanta, I was able to create the old GA license tag with his birth county on the bottom,  the year he was born, and the year it is now on either side of the tag. All the “sponsors” were places that held importance in my husband’s life, whether it was the brand of shoe he wore (or had worn – my mistake!), his favorite breakfast place, or his alma matter.

20121108-200205.jpg

3. It was time to think about ordering the bibs from Athlete Race Number:

Of course Ben got the # 35 bib!

ben’s race number

(The bibs we got were a bit pricier, because my dad agreed to get those if we put him as a sponsor. We got 100 bibs for $45.52, but you can just order 100 plain numbers for $22.43)

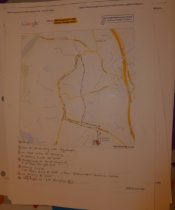
4. We then drove around to map out the race course that started and ended at my parents’ house. We made maps of the course. We decided to have a 1.1 mile option as well for walkers and kids.

Benk 3.5 mile loop map

5. I ordered the 2 gluten-free cakes from Sally’s Gluten-Free Bakery in Atlanta, Ga. A 13″x9″ sheet cake came to $35. I also ordered a half-sized cake that came in the round. They iced the cake, but couldn’t decorate it. So, I called on my mother-in-law for her cake-decorating help! (By the way, the cakes are amazing!!! None of the guests knew the difference! And my MIL is amazing!!)

GF B-Day Cake from Sally’s GF Bakery

MIL Decorating Cake

6. Ordering the Food – ALWAYS LOOK FOR COUPON CODES!! I learned the hard way, that there are cheaper ways to do things. I decided to have bagels, veggies & dip, fruit, and water. Since I didn’t have enough time to chop the veggies myself due to the fact I was flying in for this, I called Publix (the grocery) who makes wonderful GF platters. (However, if I’d know, you could pick up platters in the grocery store that weren’t part of the catering for half the price. They didn’t look as nice though.) We got both GF bagels and gluten bagels, because they were cheaper and there was no need for everyone to eat GF.

Publix Fruit Platter (M) feeding 16-20 people = $36.99
Publix Veggie Platter (M) feeding 16-20 people = $29.99
Udi’s GF Bagels – 4 bagels for at least $6
Einstein’s Bagels (with 20% whole order coupon) – 13 dozen with 2 containers of spread for $14.50 (pre-coupon)


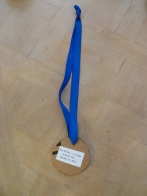
7. Making the Medals – I made witty race medals for everyone, but the birthday boy. Ben got a 1st place medal from TrophyPartner.com.
The other medals I made using an exacto knife and cardboard. Then I printed up labels with the race date info, slapped them on the back, punched holes with a hole puncher, threaded ribbon from the dollar store through it, and wrote on the front, i.e., from my architect friend I wrote “Fastest Leed Runner”
labeled benk medal

8. The Dollar Store Run – table clothes, platters, cups, napkins, cutlery, bubbles, candles, chalk

9. Creating the Silly Liability Running Waivers for all the many lawyers in the bunch, and whoever signed “agreed” that if they did not cross the finish line, they would pay for our daughter’s education (among other things). That was my dad’s cute idea.

brother-in-law (lawyer) carefully reading the liability waiver with dad

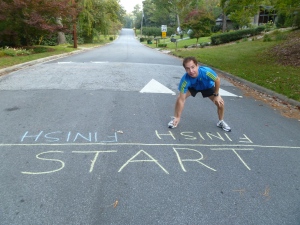
10. Chalking the Race Course – We chalked the whole race the morning of so people wouldn’t get lost.

Dad Chalking Start

11. The Surprise – Priceless!!

Surprised Husband

So, you want to know how I pulled it off? 

I told him that I was going to let him sleep late, and I’d take care of our daughter.  He had no problems with that.  We got up extra early, did everything we needed.  I had the guests arrive in the front to wait in the patio area.  Once they had all assembled, I woke Ben up and had him put on some clothes.  I told him I had made him breakfast and we were going to eat it on the patio outside.  So, this is his face when he made it outside .  .  .

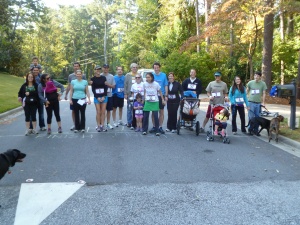
12. The Start of the Race

At the Starting Line

13. The Award Ceremony – At the end of the race, each guest received their special medal and their t-shirt.

14. Ben K Trivia – Food and dessert were complemented by funny trivia all about my husband. We had door prizes to give out with my dad’s logo on them for the winners. One of the questions asked how tall Ben was. We measured him, and the winner got the tape measure!

It was truly an amazing morning! I found this the most fun, because it gave people a reason to be social and get to know one another (and all with-in budget).

Happy Birthday to the most Beautiful Man that I know!

Read Full Post »

Diane Ravitch's blog

A site to discuss education and democracy

APS Today

The official blog of Atlanta Public Schools

Granted, and...

thoughts on education by Grant Wiggins

Celiac Central: Bits and Bites

National Foundation for Celiac Awareness staff members dish and digest

Maia Toll

Gluten-Free Food and Fun

WRiteLiveLily

A Catalog of Writing-in-Progress

Invision Events: Wedding Planner | Day Of Wedding Coordinator | Atlanta | Birmingham | Montgomery | Auburn | Dallas | Ft. Worth

Wedding Planner and Day Of Wedding Coordinator for Georgia and Alabama | Atlanta | Birmingham | Montgomery | Auburn | Mobile | Dallas | Ft. Worth

StressLess Views and other TidBits

Gluten-Free Food and Fun

Happy Go Lucky & Gluten Free

Gluten-Free Food and Fun

Gluten Freedoms' Blog

Gluten-Free Food and Fun