Feeds:
Posts
Comments

Archive for the ‘Activities’ Category

20130523-180839.jpg

The Finished Product

A Quick History of the Vidalia Onion
Growing up in Georgia, Vidalia onions were apart of the spring/summer.  Did you know that they are Georgia’s state vegetable!!??  They are ONLY grown in Vidalia, Georgia, which we southerners call them Vi-day-l-yuhs, NOT Vi-dahl-yahs.   They really came as an accident.  During the depression, farmers in GA were trying to find the cash crop.  When their onions were harvested, they realized they were sweet!  With the birth of the sweet Vidalia onion, the newly built farmers market in Southern GA, and the owner of Piggly Wiggly grocery store helping to market them, they soon became a success around the country.   Though sweet onions are grown in other places, the distinct flavor comes from the sandy soils and milder climate.

Storage Tip:
They don’t tend to last on the shelf very long, but in order to preserve their life, stick them in the leg of a panty hose and put a knot at the end of each onion.  Hang them from the ceiling and when ready to use one, just cut above the knot.

So, this delicious dish came to me by way of my mom.  I can’t say that she really spent a whole lot of time in the kitchen, but this is one of the best dishes she ever made.  I have doctored it a bit and adapted it to the GF life-style, but the truth be told, I can’t really say I notice a huge difference.  When I asked her where it came from, thinking she’d tell me who passed it down to her, she told me she invented it.  My respect for her grew right then and there!!  Thanks mom for one of my favorite dishes!!

This makes a great side dish when invited to a party or hosting your own.  Even if you don’t like onions, you’ll love this dish!!


Vidalia Onion Sweet Surprise

Serving Size: 6 full onions, feeds 6-8 people

Prep Time: 20 minutes

Cook Time: 45 minutes

Ingredients:

20130523-180903.jpg

Ingredients

  • 6 Vidalia Onions, peeled and half cored; (sweet onions will work, too)
  • 1 cup of brown sugar + 1/4 cup of brown sugar
  • (you can substitute the 1/4 cup of sugar for 1/4 cup black strap molasses)
  • 1 stick of butter (1/2 cup)
  • 1/4 cup of corn flake crumbs or cracker/cereal substitute
    (I usually buy them from Whole Foods or Amazon in bulk – 6 containers.  I freeze what I’m not using.)
  • 1/2 – 1 cup of parmesean cheese
  • 1 tsp of salt (I prefer himalayan salt)
  • 1 tsp of pepper
  • pinch of dry mustard

Supplies:

  • large pyrex dish
  • coring knife
  • sauce pan
  • stirring spoon
  • measuring cups and spoons

Directions:

  1. Preheat oven to 425*F.
  2. Core onions from the top so that the root part is at the bottom.  Create a well, so make sure to leave the bottom in tact.  You’re going to put a filling in it later.
  3. Place onions in a pyrex dish.
  4. Chop the onions pieces you cored out and place them in the dish around the onions.

    20130523-212858.jpg

    Hollowed Out Onions

  5. Fill the dish about an 1/8″ full of water so that the onions won’t burn in the oven.
  6. Meanwhile, on the stove top over low heat (or microwave), melt the butter and brown sugar together, stirring constantly (about 1-2 minutes).  You can always add more of anything.  If you want the sauce thinner, add more butter.  If you want it sweeter, add more brown sugar.  I happen to have run out of brown sugar tonight, so I poured in some black strap molasses, too, and it worked perfectly.  Then we also got the iron benefits of the molasses.

    20130523-180858.jpg

    Melting Butter & Brown Sugar

  7. Remove from saucepan from heat and add remaining ingredients.  Stir to evenly combine.

    20130523-180852.jpg

    Stirring all Ingredients together until Combined

  8. Pour the sauce into the wells of each onion, and then pour the rest of the sauce over the chopped onion bits surrounding the onions.

    20130523-180845.jpg

    Sauce Application

  9. Bake for about 45 minutes until the sauce is bubbling and the onions are softened.
20130523-200330.jpg

The Finished Onion Product

Read Full Post »

20130522-202602.jpg

The Finished Ball

One day, not long after I had gone gluten-free, my grandma, Honey, called me, to tell me of a recipe she made that just so happens to also be gluten-free.  I couldn’t have been more thrilled to think of a dessert with peanut butter and chocolate all in one that had NO GLUTEN!!  And takes about 10 minutes to make and 10 to bake!

After a lot of playing with the basic recipe my Honey had given me, I perfected a relatively low sugar dessert.  The secret is the chocolate chips stashed in the middle of the ball.

The peanut butter we use just has roasted peanuts and nothing else added.  I have often found that certain peanut butters make me sick and then I wonder if they’ve been crossed processed.  In Philadelphia you can get Crazy Richards, which was actually made by a local Philadelphian who ground his own peanuts.  Roomer has it from a parent I know that Richard use to run a small in-home daycare in the city, all the while, making his own peanut butter.

If we’re looking for an organic one, we have found Santa Cruz makes an excellent one.

Gluten-Free Inside-Out Peanut Butter Balls

Serving Size: about 20 1″ balls

Prep Time: 10 minutes

Cook Time: 10-12 minutes

20130522-202617.jpgIngredients:

  • 1 cup of peanut butter – we use peanut butter that just has roasted peanuts and nothing else added
  • 1 egg
  • 1/2 cup of sugar
  • about 1/2 cup of chocolate chips – we use Enjoy Life

Supplies:

  • large mixing bowl
  • spatula
  • cookie sheet
  • parchment paper

Directions:

  1. Preheat oven to 325*F.
  2. In a bowl, mix egg, sugar, and peanut butter all together until there is a smooth consistency.
  3. Take a pinch in your hand and roll it into a 1″ ball.

    20130522-202624.jpg

    Rolling Batter into a Ball

  4. Use your thumb to place a small whole in the middle of it.
    20130522-202648.jpg

    Small Well in Center of Ball


  5. Fill well with a handful of chocolate chips.
    20130522-202641.jpg

    Filling Well with Chocolate Chips


  6. Fold over edges of dough around chips.
    20130522-202630.jpg

    Folding Dough Edges around Chips


  7. Roll dough back into a ball.
    20130522-202654.jpg

    Dough Rolled Back into Ball with Chips inside


  8. Bake at 325*F for about 10-12 minutes.  I like mine soft, but if you prefer them crisper, then bake for longer.

    20130522-202608.jpg

    Ready to Bake

  9. Eat!

Read Full Post »

20130418-190812.jpg

My Daughter with her New Glow-in-the-Dark Necklace

Glow-in-the-dark Necklace

made from the $.25 Machine

inspired by a project in the magazine Family Fun

Tools:

  • an awl or nail to piece a hole
  • 2 feet of kite string or some other type of yarn
  • at least 4 glow-in-the-dark beads, to make it glow-in-the-dark, but any kind of bead or button will do.  We used perler beads
  • $.25 machine plastic container

Directions:

  1. Take purchase a little toy for $.25 at the grocery store, but make sure it comes in one of those little plastic containers.
  2. Remove the toy.
  3. Using an awl or some other sharp tool like a nail, pierce a whole through the top of the container.
  4. Cut a piece of string about 2 feet long.  You can always trim it when you’re done.
  5. Thread a bead or a button into the middle of the string.  Knot the string several times just above the bead.
  6. Put one end of the string next to the otherand thread it through the underside of the hole.  This way, the bead will keep the string in place.

    20130418-190756.jpg

    Strung Bottom Bead

  7. Place charms or other beads along each side of the string.
  8. When you’re ready, tie the two ends of the string together in a knot.
  9. Fill the container with whatever excites your child, i.e. glow-in-the-dark beads, bugs, snack, etc.  We filled our with glow-in-the-dark beads, so that the necklace will glow-in-the-dark!
  10. Place the necklace around your child’s neck.
20130418-190821.jpg

Our Glow-in-the-Dark Necklace

Read Full Post »

Fridgigears

20130405-210524.jpg

Playing with Newly Acquired Fridgigear!

It was one of the first beautiful, warm, and sunny days outside, so why I ventured to the basement to find this newly acquired toy from a swap, I have NO idea!!  We still did make it outside to play.  I guess I was super excited about this toy myself.  (A good sign in my opinion).

Nevertheless, this fridgigear toy is made up of magnetic gears that double as a puzzle.  It also comes with one gear that’s a motor to operate the gears.  It was a good hour of GLUTEN-FREE entertainment!  Not only did we experiment with the gears, but the next level of fun was rearranging the puzzle pieces to form newly colored gears.

20130405-210532.jpg

Rearranging the Puzzle Pieces to form New Gears

After much searching, I have been unable to find the puzzle gears.  I have found fridgigears that glow in the dark and double as a picture frame, but no puzzle pieces.  I still highly recommend this toy as great entertainment in the kitchen while you’re cooking!

I just bought some extra sets for presents.  I found an AMAZING deal at www.scientificsonline.com for $19, and you can get another 12% off if you use the code TY2.  It’s also free shipping if you choose the slower route.

Let me know if you’ve come across other types of refrigerator fun that you love!

Read Full Post »

Our Kid-Friendly, GF/DF Seder

photo(1)

Having Fun with Friends and Family

Passover is one of my most favorite holidays.  It’s the celebration of the Jewish People leaving Egypt as slaves.  We get together to sing songs and eat and celebrate our freedom.  With several little people at the seder (the passover meal), we revised the way we did things.  We brought in Sammy the Spider’s Passover Haggadah, (the book we use for the order of the seder and the songs).  It was a big hit!!

The Haggadah with Sammy the Spider

photo 1

Sammy the Spider Haggadah

We will confess that though it was the perfect dinner, the haggadah was missing the 4 glasses of wine and the majority of the plagues, that we will add in next time.

The Seder Plate

photo 2

The Seder plate has food on that is symbolic of the Jews leaving Egypt:

  • matzah – is the cracker like bread that the Jews made before leaving Egypt, but didn’t have time to let it rise.  It baked on their backs.
  • the “roasted” egg (though this one was not) – symbolized the renewal and cycle of life generations later
  • an orange – symbolizing solidarity with the LGBT community
  • bitter herbs (usually horseradish) reminds us of the bitter times when we were slaves in Egypt
  • the shank bone (a bone from a lamb, but you can see the dog bone for this one) – represents the lamb that was the special  sacrifice the night before the exodus from Egypt
  • Charoset – the apple, nuts, and wine mixture that represents the mortar of the bricks the Jewish had to make as slaves in Egypt
  • Parsley or Celery dipped in salt water – to symbolize the tears shed by the Jews in slavery

The Matzah

photo 3

Yehudah GF Matzah

The best GF Matzah out there is Yehudah matzah.  It was marked on our table, because it technically can’t be used for sacrimental purposes since it does not contain any wheat.  However, it tastes far better than the gluten matzah (like potato chips) and doesn’t make you constipated!!

Lighting the Candles

photo 4

Lighting the Candles

It is customary to light the candles to welcome the holiday into the home.  Here my daughter and nephew were helping my mom.

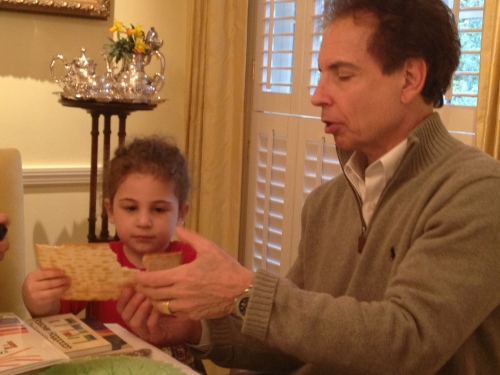
Breaking the Middle (GF) Matzah (Afikomen)

photo 5

Breaking the Middle Matzah with Bop

During the Seder, from the stack of 3 matzah on the table, you take the middle one and break it in half.  The larger “half”, called the Afikomen, symbolizes the lamb sacrifice (which is sacrificed no more since the Biblical Jewish Temple was destroyed.  The Afikomen is then wrapped up in a napkin and hidden for the kids to find after the Seder is over.  It’s like their incentive to sit through the whole Seder.  Once it is found, money is usually handed out.  When my mom told everyone they would get a present, my daughter was super excited.  My mom handed out $2 bills and my daughter says, “This is not a present!!”

Appetizer: The Matzah Ball Soup

photo 1

Using Stickers while Awaiting the Soup

photo 2

Yum! The Delicious GF Matzah Ball Soup!

Matzah Ball Soup is on of the traditional foods served at Passover.  A thin chicken stock is used and the balls are made out of matzah meal (ground matzah).  These GF matzah balls were served to all the guests and no one knew the difference.  They were light and fluffy.  They were the best GF matzah balls I’ve had yet.  (See recipe for Gluten-Free Matzah Balls below).

The Meal

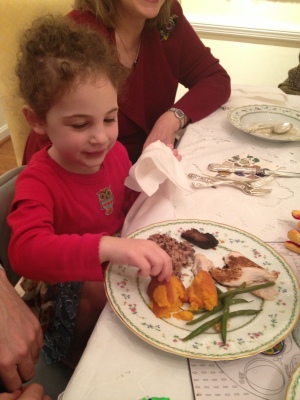
photo 3

Utensil-less Eating of the Delicious Passover Meals

photo 1

My Sister and Niece Eating a Yummy GF Meal

The whole meal was gluten-free (and dairy-free), and why not?!!  We had brisket, turkey, carrot souffle, green beans with almonds, and wild rice.  Feel free to ask for any of the recipes.

The Modern Seder

photo 4

My Gma Video-Chatting with her Newest Great-Grand Child

Write and tell me about your Seder traditions and experiences and ways of making it gluten-free and/or kid-friendly!

Mother’s Matzo Balls

adapted from Keneseth Israel Sisterhood Cookbook out of Louisville, Kentucky 1971

photo 2

GF Matzah Ball Soup

Serving Size: about 30, 1.5″ in diameter balls

Ingredients:

photo 3

  • 3 tbsp of chicken fat (skimmed off of the top of homemade chicken stock)
  • 3 eggs, slightly beaten
  • 3/4 cup matzah meal
  • 1 tsp salt
  • 3 tbsp of soup stock
  • pot of stock (we use chicken that we made)

Directions:

  1. Mix fat, eggs, seasoning and liquid.
  2. Add matzah meal and mix lightly until blended.
  3. Cover the mixing bowl and place in the refrigerator for at least 20 minutes.
  4. Bring stock to a brisk boil.
  5. Make matzah balls using about a tsp to scoop them out and drop them into briskly boiling stock.
  6. Cover pot and simmer for 40 minutes.
  7. Enjoy!

Read Full Post »

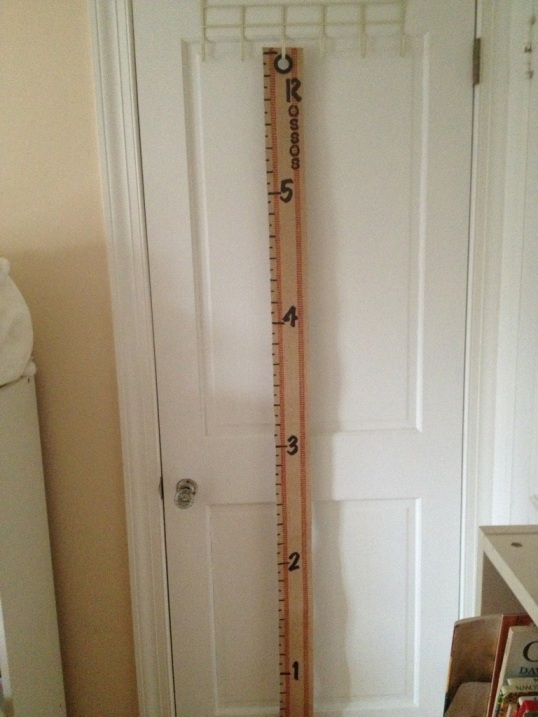
20130225-210548.jpg

Finished Growth Chart

I LOVE to craft and especially for my friends who have just had babies.

My criteria for making things:

1. It needs to be useful
2. It needs to be something that will be used for more than just a few months
3. It needs to be personal

I decided that I wanted to make something I’d never made before.  So, after doing lots of research, I came across this amazing growth chart from Whipperberry.com, in which the height is pinned on by tags (not featured in the picture above).

The instructions were not as clear as I would have likes, and finding the supplies definitely proved more challenging.  This is what I did and what I’ve learned:

DIY Jute Growth Chart

Supplies:

20130225-210612.jpg

– *Jute (burlap) webbing (it’s about 3.5″ wide), at least 6.5 ft long = 78″ long = about 2.5 – 3 yds if wanting to make the numbers up to 6 ft (.85/yd)
– tape measure (or ruler)
– tape (if using tape measuring to hold it next to chart
– *black shower curtain grommet (1″ in diameter for pack of 8) – from Hobby Lobby 6.99

3 1/4" Round Glass Jar with Flip Lid

3 1/4″ Round Glass Jar with Flip Lid

1" Matte Black Curtain Grommets

1″ Matte Black Curtain Grommets

– hammer (to secure grommet)
– sharp scissors (to cut hole for grommet)
– 1 fine point black sharpie (came in 2 pack for about 2.99)
– 1 ultra fine point black sharpie (came in pack of 2 for 3.99)
– *1 set of stencils with letters and numbers (mine were 2″ sized by C-Thru Better Letter in the “Marker” font) – I got mine at Michael’s, but can’t find them online.  I also recommend getting a smaller size as well.  Hobby Lobby has some fun ones and you can sort by size of the stencil.
– *key tags (from hardware or office supply store) – I used 1/2 the box (7.79 for 50 tags)

20130225-210524.jpg

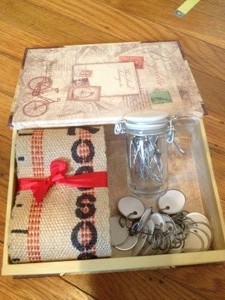
Book Box

– *extra large safety pins (from craft supply store, the brand I got was care & repair) – about 2.99 for 50
– *3 1/4″ Round Glass Jar with Flip Lid – from Hobby Lobby 1.99
– *box to put finished chart in – I found these cute book boxes at Michael’s (8.99, which I got for 6.29 on sale)

Total Cost*: $34.25 (the items are an investment, but once you have them, then you don’t have to purchase many of them again.

Price of items per chart (dividing everything into individual items): $22.75

Directions:

1. Layout jute and use measuring tape to cut to length you want.  My first one was too short at just 6′, so I would cute it to 6.5 ft or  about 78 inches.

2. Put your grommet in next by lining it up in the center at the top and tracing around it.  I found that I kept having to make my whole a bit wider than I thought.

3. Cut out the hole with your scissors.

4.  Place front and back of grommet around hole.  I tried to use a hammer to get them to snap into place, but I actually found that I had to stand on it with my heel.

20130225-210618.jpg

Measuring Tape Taped to Chart

5. Line up your measuring tape along the side of the jute.  I used clear tape to tape it into place.

6. With my ultra fine point marker, I started by marking all the feet first (i.e. at 12″, 24″, 36″, etc.).  I made about an inch long horizontal line across and it’s about 1/8″ thick.  I did an outline of the rectangle and went back later to fill it in.

7. Then, I used my ultra fine point marker to make small (about 1/4 inch long)  horizontal lines at all the odd numbered inches, starting at 1,3,5, etc., and I made about 1/2 inch long lines at the even numbers.  The even numbered line with all the way to the red stripes.  Again, about 1/8″ thick.

8.  I went back to shade in all the marks with the thicker of the sharpies.

9. Then, I used my stencils and lined them up at the foot marks.  I used my ultra fine sharpie to trace it and the thicker one to fill them in.

10.  Finally, I chose to put the family’s last name on the chart so that both boys could use it.  That was a bit trickier, because I realized I was running out of room between the 6th and 5th foot.  Another reason to make your chart longer so the grommet doesn’t interfere.  I used my stencils with the ultra fine marker to trace the letters and then I filled them in with the thicker one.  I also noticed that I couldn’t use large letters the whole way down, because I was running out of room.  I had to use smaller stencils. 

20130225-210531.jpg

Completed Chart Package

11.  When I was done, I flipped it over on the back to write a personal message.

20130225-210540.jpg

Personal Message on Back of Chart

Please tell me what kinds of creative additions you made to your chart or anything you learned while making it!

Read Full Post »

20130315-175915.jpg

Klehr Dough and Supplies

It was another cold and blustery day here in Philly.  Terribly bone chilling, that I just couldn’t force myself to take my daughter outside.  We called over a friend, and I decided to make some gluten-free play dough.  Well, of course, I was somehow out of rice flour, but found Pamela’s gf flour blend that was past its prime, and decided to try it out.  (Normally I would never use an expensive gf flour blend, but this seemed totally worth not wasting!)  The best part was that my daughter asked if she could eat it, and I made food-grade play dough, so yes, it’s totally edible!

*BIRTHDAY IDEA*:  We made this as give-aways for my daughter’s 3rd birthday.  We bought little containers at the dollar store, and each child got to add colored glitter of choice to his/her container.

When playing with our play dough, we bring out all sorts of utensils from both her kitchen and mine, along with cookie cutters, and b-day candles.  It really adds to the fun!  Tell me what you like to use with your play dough.

Gluten-Free Play Dough Recipe

The Recipe is adapted from Kids with Food Allergies Foundation

Serving Size: 1 batch = will fill a 16 oz container. A double batch will fill a 32 oz yogurt container.

Ingredients:

zqb-30891b_1z

India Tree All-Natural Food Dye

– 1+1/4 cup of rice flour or gf flour blend (I have done both and come out great!)
– 1/2 cup of salt (I used Himalayan salt, and it turned the dough a light pink)
– 2 tsp cream of tartar
– 1 cup water
– 1 tbsp oil
– 1/4 tsp gf vanilla (I use frontier vanilla flavor, so there’s no alcohol involved)
– glitter or sparkles (optional)
– food coloring (optional) – I like to use all natural (GF) food coloring from India Tree

Supplies:

– large pot
– mixing spoon or spatula
– measuring cups and spoons
– airtight container to put play dough in
– cookie cutters (optional)
– b-day candles (optional)

Directions:

1. Mix dry ingredients in large pot first: flour, salt, cream of tartar
2. Add water and oil and mix
3. Heat over the stove top at a medium heat.
4. Stir constantly for about 5 minutes, until mixture pulls away from sides.
5. Add vanilla and mix thoroughly.*
6. When cool, place in air tight container. (We like to reuse old yogurt containers.)

*Options:
1. You can add food coloring to the water before you stir it in.  You can always add it after you’ve made the dough, but it will stain your hands.
2. You can add sparkles or glitter to the batch once its made.

Read Full Post »

20130228-134725.jpg

And, NO, I was thankfully not in the car.

Sorry for my delay in getting posts up, but I have been side tracked by a hit and run side swipe in the Whole Foods parking lot!!

I found my car with someone else’s paint all over the back driver’s side after finishing my shopping. And just to think that I was wondering how I was going to kill an hour before picking up my daughter and her friend 🙂 !

20130228-134732.jpg

First, I took pictures of the car and ground where paint lay everywhere. Then, I ran back into whole foods to see if I could look at their video camera, only to learn that because their parking lot is leased, only an insurance company can have access to it. Grrr!

Just as I was leaving I ran into a lovely police officer who advised me to file a police report.

So, I head around the corner to (luckily) the police precinct, only to learn:

1. You have to have your insurance card and registration on hand, (so I had to go back to the car to fetch it!)
2. My deductible might be higher than the estimate, in which case it doesn’t behoove me to file it, and therefore I will never have Whole Foods video footage.
3. The only way to find out what is best for me to do is to go get an estimate before filing.

But honestly, I just want to watch the videos and catch the jerk who didn’t even bother to leave a message, other than half the paint off his/her car.

I guess I must have needed some adventure today. Lol!! Alas. . .

Read Full Post »

DSC00997

Gluten-Free Renegade Latkes

Photograph taken by Brittany Sanford

At the last minute, I decided to throw a very small gathering Hannukah Party.  And of course, what’s a Hannukah party without Latkes.  I usually make sweet potato latkes, but this year I decided to get a bit more rebellious and cook with my most favorite ingredient . . . MOLASSES!  If you want to read more about the health benefits of molasses, check out the Frankenstorm Chocolate Chip Molasses Brittle Cookies Recipe.

My specialty is sweet potato latkes.  When I realized I only had two sweet potatoes in my kitchen, I knew creativity was to be born!  I decided to mix the sweet potatoes with butternut squash, but that would cut the sweetness.  I then decided to add apple to give it a sweet burst, and upon looking in the fridge, I had this burning desire to use my parsnip.  Well, then I concluded I needed it to be a bit sweeter, which gave me an excuse to use my favorite ingredient.  That’s right!  You guessed it . . . BLACKSTRAP MOLASSES!

Personally, I thought the latkes were sweet enough without the molasses, but my guests thought the molasses really hit the spot.

Gluten-Free Renegade Latkes

Serving Size: about 22 2″ in diameter latkes

Ingredients:

2 cups of grated sweet potato, skins scrubbed
2 cups of grated butternut squash, peeled and seeded
1/2 cup of grated apple, skins scrubbed and core removed
1/2 cup of grated parsnip, skins scrubbed
6 scallions chopped
1/2 onion chopped
2 eggs, slightly beaten
1 tbsp of blackstrap molasses
1/2 cup of gluten-free flour* (see #6 below for more details)
1 tsp salt
1/2 tsp pepper
Frying Oil – Coconut, Canola, etc.

Directions:

1. Preheat oven to 200*F

2. Grate the potato, squash, apple, and parsnip and put in separate containers.

20121209-221852.jpg
Grated Sweet Potato (front) and Butternut Squash (rear)
20121209-221901.jpg

Grated Apple (left) and Grated Parsnip (right)

2. Grate the potato, squash, apple, and parsnip.  The apple will need to be squeezed out.  I used a ricer to squeeze out the juices, which I caught in another cup and drank!  Then mix all the food you grated together in a large bowl.  If you decided to create your own base ingredient mix, then make sure that together it weighs about 1 lb or 16 ounces.

20121209-205431.jpg

3. Chop onions and scallions and toss them into the mix.

4. Add salt and pepper and toss.

5. Add slightly beaten egg and molasses and toss to mix evenly.

6. Add 1/2 cup of your gluten-free flour blend or 1/4 cup of a gluten-free 1/4 cup of a starch.  I use my hands to mix this in really well and make sure the consistency is just right.  If not, I add about a teaspoon at a time of more flour.  For one batch I used a gf flour blend, and another batch I mixed 1/4 cup of brown rice flour with 1/4 cup of tapioca starch.  As for flours, just pick one with a milder flavor and any starch will do.  Some people like to use potato starch, since you’re cooking with potato.  Other recipes call for only starch, but I really prefer the starch/flour combo or gf flour blend.

Latke Mix

7. Add oil to your pan so that it comes up about 1/4 of an inch high.  I set the burner to right below the highest heat setting and wait about 5 minutes to make sure my oil is good and hot.

8.  While the oil is heating up, I put parchment paper on a baking sheet, and set that in the preheated oven.

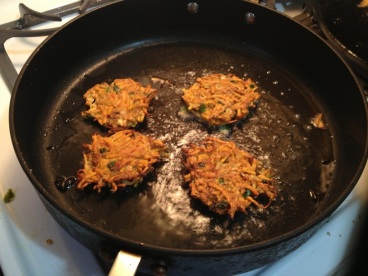
9. Then, I use my hands to make about a 2″ in diameter flat pancake.  I lay that on a spatula, and gently put it in the oil.  I put about 4-5 latkes in the oil so as not to decrease the heat too much.  You want the oil to bubble when you put it in.  I cook it for about 1-2 minutes per side.  When the edges start to brown, then you know to flip it.

20121209-205442.jpg

Frying Latkes

10. When the latkes are done, I transfer them onto the baking sheet in the oven.

11.  When all the latkes are completed, I turned my broiler onto low and just finished them off in there so that they would be super crispy.

12.  You can top with applesauce, sour cream, or some other fun dip!

The latkes turned about to be  AMAZING!!!  I was so glad I made 3 batches for 7 1/2 people.  I would not have had enough!

Read Full Post »

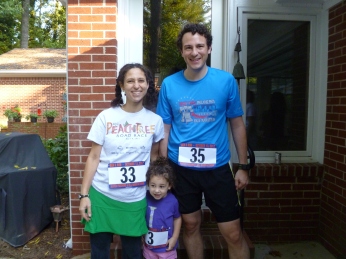
My Little Family

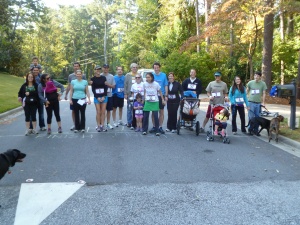
I had been planning this day for many, many months. As my husband, a non-athlete, took up running almost 2 years ago, I never thought he would stick with it, and as it turns out, he just completed the Philly Marathon less than a week ago. I am so incredibly proud of him and honored to know him, that I had to come up with a way to support his dedication and honor his perseverance . . . A surprise 35th (gluten-free) birthday party with a running theme!
If there’s anything to know about me, it’s that I LOVE surprises, and I LOVE themes. So, with my dad’s help, it all began.
The theme: a 3.5 mile run for my husband’s 35th birthday. His last name starting with a K, the race was titled:

The BEN K 3.5 mile Run

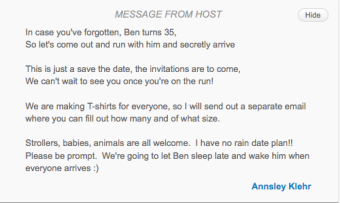
1. We sent out Evites

Invitation

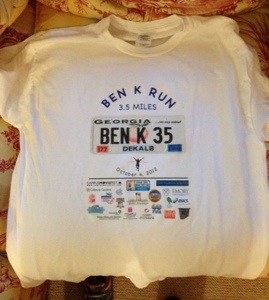
2. We began designing our race shirts. We first designed them with photoshop and then ironed on each one. I ordered iron-on transfers in bulk from amazon.com (18 for around $18) and the shirts from http://www.shirtsupplier.com (around $2/shirt). Since my husband is from Atlanta, I was able to create the old GA license tag with his birth county on the bottom,  the year he was born, and the year it is now on either side of the tag. All the “sponsors” were places that held importance in my husband’s life, whether it was the brand of shoe he wore (or had worn – my mistake!), his favorite breakfast place, or his alma matter.

20121108-200205.jpg

3. It was time to think about ordering the bibs from Athlete Race Number:

Of course Ben got the # 35 bib!

ben’s race number

(The bibs we got were a bit pricier, because my dad agreed to get those if we put him as a sponsor. We got 100 bibs for $45.52, but you can just order 100 plain numbers for $22.43)

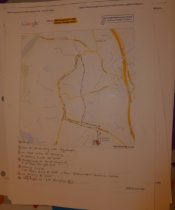
4. We then drove around to map out the race course that started and ended at my parents’ house. We made maps of the course. We decided to have a 1.1 mile option as well for walkers and kids.

Benk 3.5 mile loop map

5. I ordered the 2 gluten-free cakes from Sally’s Gluten-Free Bakery in Atlanta, Ga. A 13″x9″ sheet cake came to $35. I also ordered a half-sized cake that came in the round. They iced the cake, but couldn’t decorate it. So, I called on my mother-in-law for her cake-decorating help! (By the way, the cakes are amazing!!! None of the guests knew the difference! And my MIL is amazing!!)

GF B-Day Cake from Sally’s GF Bakery

MIL Decorating Cake

6. Ordering the Food – ALWAYS LOOK FOR COUPON CODES!! I learned the hard way, that there are cheaper ways to do things. I decided to have bagels, veggies & dip, fruit, and water. Since I didn’t have enough time to chop the veggies myself due to the fact I was flying in for this, I called Publix (the grocery) who makes wonderful GF platters. (However, if I’d know, you could pick up platters in the grocery store that weren’t part of the catering for half the price. They didn’t look as nice though.) We got both GF bagels and gluten bagels, because they were cheaper and there was no need for everyone to eat GF.

Publix Fruit Platter (M) feeding 16-20 people = $36.99
Publix Veggie Platter (M) feeding 16-20 people = $29.99
Udi’s GF Bagels – 4 bagels for at least $6
Einstein’s Bagels (with 20% whole order coupon) – 13 dozen with 2 containers of spread for $14.50 (pre-coupon)


7. Making the Medals – I made witty race medals for everyone, but the birthday boy. Ben got a 1st place medal from TrophyPartner.com.
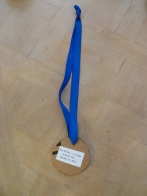
The other medals I made using an exacto knife and cardboard. Then I printed up labels with the race date info, slapped them on the back, punched holes with a hole puncher, threaded ribbon from the dollar store through it, and wrote on the front, i.e., from my architect friend I wrote “Fastest Leed Runner”
labeled benk medal

8. The Dollar Store Run – table clothes, platters, cups, napkins, cutlery, bubbles, candles, chalk

9. Creating the Silly Liability Running Waivers for all the many lawyers in the bunch, and whoever signed “agreed” that if they did not cross the finish line, they would pay for our daughter’s education (among other things). That was my dad’s cute idea.

brother-in-law (lawyer) carefully reading the liability waiver with dad

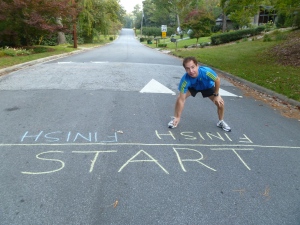
10. Chalking the Race Course – We chalked the whole race the morning of so people wouldn’t get lost.

Dad Chalking Start

11. The Surprise – Priceless!!

Surprised Husband

So, you want to know how I pulled it off? 

I told him that I was going to let him sleep late, and I’d take care of our daughter.  He had no problems with that.  We got up extra early, did everything we needed.  I had the guests arrive in the front to wait in the patio area.  Once they had all assembled, I woke Ben up and had him put on some clothes.  I told him I had made him breakfast and we were going to eat it on the patio outside.  So, this is his face when he made it outside .  .  .

12. The Start of the Race

At the Starting Line

13. The Award Ceremony – At the end of the race, each guest received their special medal and their t-shirt.

14. Ben K Trivia – Food and dessert were complemented by funny trivia all about my husband. We had door prizes to give out with my dad’s logo on them for the winners. One of the questions asked how tall Ben was. We measured him, and the winner got the tape measure!

It was truly an amazing morning! I found this the most fun, because it gave people a reason to be social and get to know one another (and all with-in budget).

Happy Birthday to the most Beautiful Man that I know!

Read Full Post »

Christmas time is one of my mom’s favorite holidays, especially because of the lights.  We use to ride to different neighborhoods admiring all the holiday lights.  I, too, got that love from my mom!

So, tonight, with a clear, crisp sky, a half moon hanging above, and many of the people that I love: my mom, dad, husband, daughter, aunt and a few friends went to the Atlanta Botanical Gardens for their spectacular light show.  In particular, it is a very kid-friendly venue that had my daughter saying, “Come On” throughout the whole gardens.  She didn’t even want to get in her stroller it was so exciting!

We  packed a GF dinner for my daughter and were on our way by 4:45 pm to avoid bedtime conflict.  It was definitely dark by the time we left.

Here were mine and my daughter’s favorite highlights:

1.  A Bonding Moment with Froggy

Froggy on a Bench

2. The Chihuly Fountain (with the half moon hanging over our heads)

Chihuly Fountain

3. The Garden Railway featuring Coca-Cola Trains as well as a Tootsie Roll one

Holiday Garden Railway

4. Lights of Sculpture Dancing to Music

Dancing Lights

5. *S’mores Making – *Note: There is a fire pit where you can roast s’mores that you purchase there.  If you want to make s’mores, bring your own graham crackers (S’morables by Kinnikinnick), chocolate (Enjoy Life), and marshmallows (Kraft).  They provide you sticks, so you’ll have to pay a fee of sorts, but it’s totally worth it.

Fire Pit for S’Mores

Read Full Post »

My daughter & Me at Thanksgiving Dinner

Autumn is one of my favorite times of year because it speaks to cool, crisp air, falling leaves, harvests, family gatherings, and lots of food.  This all sounds great!  Then the reality of the situation hits; my imagination runs wild and I see a playground for gluten: The slide is a big wet lasagna noodle, the swings seats are plump, cushy pumpkin muffins, the dirt is stuffing giving way under the shuffle of feet as animals, adults, and kids slurp and slide all over, smearing gluten from one play structure to the next.
Then the chilly fall air blows across my face and I’m back to reality – gobs of friends and family hovering over the food, fingers picking, serving spoons jumping from one platter to the next. . . This could end up as a regular old disaster, but I then I take hold of my imagination and decide to control the situation with ORDER.

To read more, click here . . .

This article can also be found on the National Foundation for Celiac Awareness’s Celiac Central: Bits and Bites Page

Read Full Post »

20121116-090249.jpg

I was completely overdressed for my mid-morning hike in the woods. The day was unseasonably warm, but since I think in a past life I must have been a sun worshipper, it was the perfect day for me, with the low, fall-sun beaming on my face. I was surprised to find a few radiant leaves still clinging to the branches after both Hurricane Sandy (a.k.a. Frankenstorm) and Nor’easter Athena hit. The gurgling creek passed by next to me, as if carrying all my worries away.

During the fall season, the big dipper, known as the Great Bear begins to sink lower into the night sky. The Native Americans believed it to be an indication of the change in seasons, revealing that the bear was going into hibernation. So, too, are we. Fall and winter are filled with added darkness, a welcomed relief from the busier, more energetic summer days. Fall brings about a calmer air as the days get shorter, and we spend more time indoors hibernating. It is also a time when I am able to spend more time with myself in reflection. This heaven-sent weather and time spent with the trees helped remind me to pay attention to myself if only for a minute.

I reminded myself to really stay focused in the present, take deep breaths, and enjoy where I was. It’s easy for me to find the cell phone or some other means of distraction since I am a creature who loves people and socialization!

As I walked, the blue sky penetrating through the empty branches, I began thinking about my doctor’s appointment the day before. . .
20121116-090257.jpg
A bit of background . . . I have been working incredibly hard to regain my health after being sick for so many years before going gluten-free. It’s clear that the diet was the best decision for my body, but I had still been struggling to feel good every day. Often times from vitamin deficiencies I’d feel exhausted, I would run migraines, have stomach aches, or any number of other symptoms. My AMAZING doctor had me tested for other food intolerances through a stool sample. It came up that I have a super high intolerance to casein, (a protein in dairy), as well as minor intolerances to almonds, avocado, coconut, lemon, etc. I was fairly bummed out to learn this, since it meant removing more food from my diet, which I already found limiting. What it also told me is that I have a leaky gut, meaning that food literally leaks out due to past gut damage. The thought was that if I healed my gut, many of these problems would hopefully resolve themselves.

I revisited the doctor to tell her that I have never felt so alive in my whole life (or that I can remember). I had been doing everything in my power (and still am) to heal my gut as crazy as some things might sounds: I swallow whole cloves of raw garlic, eat manuka honey, drink Himalayan salt in my water, take probiotics and prebiotics, drink something called bitters to help stimulate digestion before I eat, and twice a day I make sure I eat fermented foods. This has truly helped me in every way. The migraines are gone, the stomach aches are resolving, and regardless of how little sleep I get, I still feel good. My mind is clear, and I’m just so happy. Being physically sick clearly affected my overall level of happiness.

In a nut shell, my doctor tells me that I’ve done an amazing job of helping my body to heal. She believes that once I have done such damage to my GI tract, she thinks I will always have to take probiotics and eat fermented foods. I guess it seems like a small price to pay, but the truth was that I was a bit disheartened by the news. For once in my life I wanted not to have to be so mindful.

As I walked though the woods, I allowed the wind to help me clear my head. I allowed myself to be sad, but it was hard to feel sad when I could see the beauty around me, and the strength that my body has been given.

20121116-090304.jpg

Every fall I have watched as the trees let go of their leaves, but I didn’t always notice. This day, I was noticing everything. Fall is a time for letting go of what we do not need in our lives, just as the trees let go of their leaves. I attempted to let go of that which I could not control; I tried to let go of my sadness and frustration behind my struggle to heal my body.

I also noticed the trees that had already shed their leaves, standing so naked and vulnerable, which is how I think I often feel when I let go of something I have held onto for so long. Without the leaves to hide behind, there are no pretenses with a tree. It is what it is. When I accept where I am in life, then I am being true to myself; I am truly me as the tree is the tree. The noble tree reminded me to accept and embrace who I am and what I have been through as part of being me. When I do that, I find that I really like me, and it makes me a happier person and a better friend.

The same way that different religions are mindful of the foods they eat – like Jews with Kosher foods and Islamics with Halal foods – being gluten-free, soy-free, and dairy-free has truly taught me mindful eating. I think very hard about where my food comes from, how I’m preparing it, and the energy it gives me. This would have never been my thought process before going gluten-free. I am truly grateful for this path in life, for the good health for which I have worked hard, and all my friends and family who have supported me through it all. For all the moments I forget how lucky I am, I guess this is the season to reflect, remember, and say thank you.

So, just in case you haven’t paid attention to the seasons, it’s not too late to start!

Thank You!

Read Full Post »

Blueberry Picking Together at Greener Partners, Collegeville, PA

My daughter is not one to sit still (and neither am I).  So, summer is the perfect time for us to play in the sun and share precious outdoor moments that don’t involve gluten.

  1. Go Fruit or Veggie Picking – If you’re looking for Organic, Integrated Pest Management (IMP), or just run of the mill fruit, this is the season.  Strawberries have come and gone, but there are still blueberries, blackberries, raspberries, and peaches to come.  At Longview Center for Agriculture, you can pick fresh veggies like kale, collards, basil, mustard greens, and thyme as well as blueberries.  (They happen to also make AMAZING gluten-free smoothies).  Call ahead to see if what you want to pick is still in season.

To read more, click here . . .

This article can also be found on the National Foundation for Celiac Awareness’s Celiac Central: Bits and Bites Page

Read Full Post »

L getting eating by the sculpture

This was an “accidentally” cool trip.  My daughter and I had gone to Abington Arts Center to join the Abington Township Pool, Penbryn.  Once we took our pictures for our cards, we had time to explore the area.  We stumbled upon the sculpture park.

Abington Sculpture Park

It was sooo cool!  There were tons of interactive sculptures like the mouths above, and lots of grass to run around, and a short paved trail through the woods with more sculptures.

Sculptures Hanging from a Tree

Sculpture hanging from a tree above a bench in the shade where we stopped to rehydrate and have snacks.

Flying Birds from Afar

A stage like platform where we could run around under another sculpture of yellow birds flying through the air.

Front of Wood House

Back of Wood House

Inside of Wood House

I felt like I was in Goldilocks and the Three Bears.  Here we were, trying out the desk, laying in the bed, sitting on the bench . .

The path/nature trail paved with sculptures

All in all, the sculpture park was a great activity!  If you’re ever in Philly or have one in your own city, it’s the perfect morning or afternoon excursion.

Read Full Post »

Diane Ravitch's blog

A site to discuss education and democracy

APS Today

The official blog of Atlanta Public Schools

Granted, and...

thoughts on education by Grant Wiggins

Celiac Central: Bits and Bites

National Foundation for Celiac Awareness staff members dish and digest

Maia Toll

Gluten-Free Food and Fun

WRiteLiveLily

A Catalog of Writing-in-Progress

Invision Events: Wedding Planner | Day Of Wedding Coordinator | Atlanta | Birmingham | Montgomery | Auburn | Dallas | Ft. Worth

Wedding Planner and Day Of Wedding Coordinator for Georgia and Alabama | Atlanta | Birmingham | Montgomery | Auburn | Mobile | Dallas | Ft. Worth

StressLess Views and other TidBits

Gluten-Free Food and Fun

Happy Go Lucky & Gluten Free

Gluten-Free Food and Fun

Gluten Freedoms' Blog

Gluten-Free Food and Fun