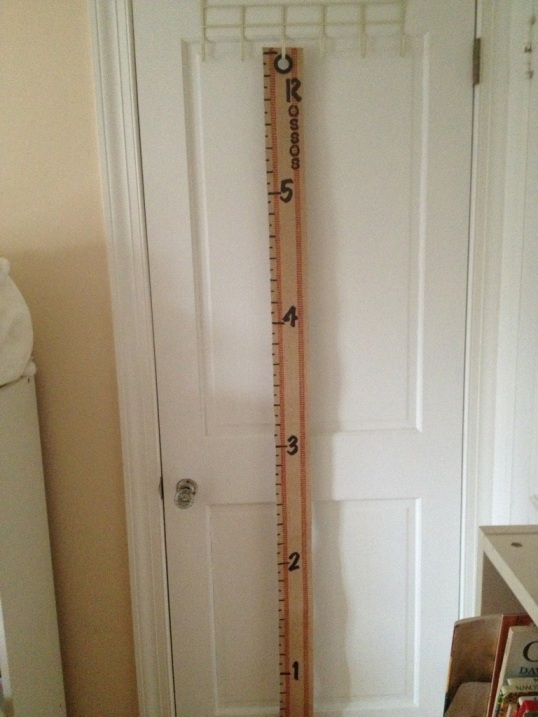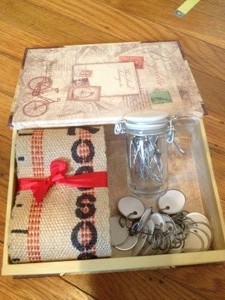
Finished Growth Chart
I LOVE to craft and especially for my friends who have just had babies.
My criteria for making things:
1. It needs to be useful
2. It needs to be something that will be used for more than just a few months
3. It needs to be personal
I decided that I wanted to make something I’d never made before. So, after doing lots of research, I came across this amazing growth chart from Whipperberry.com, in which the height is pinned on by tags (not featured in the picture above).
The instructions were not as clear as I would have likes, and finding the supplies definitely proved more challenging. This is what I did and what I’ve learned:
DIY Jute Growth Chart
Supplies:

– *Jute (burlap) webbing (it’s about 3.5″ wide), at least 6.5 ft long = 78″ long = about 2.5 – 3 yds if wanting to make the numbers up to 6 ft (.85/yd)
– tape measure (or ruler)
– tape (if using tape measuring to hold it next to chart
– *black shower curtain grommet (1″ in diameter for pack of 8) – from Hobby Lobby 6.99

3 1/4″ Round Glass Jar with Flip Lid

1″ Matte Black Curtain Grommets
– hammer (to secure grommet)
– sharp scissors (to cut hole for grommet)
– 1 fine point black sharpie (came in 2 pack for about 2.99)
– 1 ultra fine point black sharpie (came in pack of 2 for 3.99)
– *1 set of stencils with letters and numbers (mine were 2″ sized by C-Thru Better Letter in the “Marker” font) – I got mine at Michael’s, but can’t find them online. I also recommend getting a smaller size as well. Hobby Lobby has some fun ones and you can sort by size of the stencil.
– *key tags (from hardware or office supply store) – I used 1/2 the box (7.79 for 50 tags)

Book Box
– *extra large safety pins (from craft supply store, the brand I got was care & repair) – about 2.99 for 50
– *3 1/4″ Round Glass Jar with Flip Lid – from Hobby Lobby 1.99
– *box to put finished chart in – I found these cute book boxes at Michael’s (8.99, which I got for 6.29 on sale)
Total Cost*: $34.25 (the items are an investment, but once you have them, then you don’t have to purchase many of them again.
Price of items per chart (dividing everything into individual items): $22.75
Directions:
1. Layout jute and use measuring tape to cut to length you want. My first one was too short at just 6′, so I would cute it to 6.5 ft or about 78 inches.
2. Put your grommet in next by lining it up in the center at the top and tracing around it. I found that I kept having to make my whole a bit wider than I thought.
3. Cut out the hole with your scissors.
4. Place front and back of grommet around hole. I tried to use a hammer to get them to snap into place, but I actually found that I had to stand on it with my heel.

Measuring Tape Taped to Chart
5. Line up your measuring tape along the side of the jute. I used clear tape to tape it into place.
6. With my ultra fine point marker, I started by marking all the feet first (i.e. at 12″, 24″, 36″, etc.). I made about an inch long horizontal line across and it’s about 1/8″ thick. I did an outline of the rectangle and went back later to fill it in.
7. Then, I used my ultra fine point marker to make small (about 1/4 inch long) horizontal lines at all the odd numbered inches, starting at 1,3,5, etc., and I made about 1/2 inch long lines at the even numbers. The even numbered line with all the way to the red stripes. Again, about 1/8″ thick.
8. I went back to shade in all the marks with the thicker of the sharpies.
9. Then, I used my stencils and lined them up at the foot marks. I used my ultra fine sharpie to trace it and the thicker one to fill them in.
10. Finally, I chose to put the family’s last name on the chart so that both boys could use it. That was a bit trickier, because I realized I was running out of room between the 6th and 5th foot. Another reason to make your chart longer so the grommet doesn’t interfere. I used my stencils with the ultra fine marker to trace the letters and then I filled them in with the thicker one. I also noticed that I couldn’t use large letters the whole way down, because I was running out of room. I had to use smaller stencils.

Completed Chart Package
11. When I was done, I flipped it over on the back to write a personal message.

Personal Message on Back of Chart
Please tell me what kinds of creative additions you made to your chart or anything you learned while making it!
Read Full Post »


