
A Slice of the Swiss Chard Artichoke Pie
I was trying to think of something clever to do with my swiss chard, because I’m trying to eat up everything in my refrigerator before heading to visit family for Passover. So, I came up with this Gluten-Free Swiss Chard and Artichoke Pie using the Chebe dough.
Swiss Chard and Artichoke Pie
adapted from Martha Stewart’s Swiss Chard Pie
Serving Size: 6-8 people, assuming no one is having seconds
Ingredients for the Pie Filling:
- 2 tablespoons extra-virgin olive oil
- 1 onion, diced (any kind will do)
- 4 garlic cloves, minced
- 2 1/2 pounds Swiss chard, stems cut into small dice and leaves torn (I just used one bunch)
- 1 can of artichoke hearts, drained and chopped
- dash of red-pepper flakes (or more to taste. I was afraid my daughter wouldn’t eat it if it was spicier.)
- Coarse salt and ground pepper
- 1/2 cup grated hard cheese (I used a blend of parmeasan and romano)
- 1 tablespoon fresh lemon juice (I just squeezed in half a lemon and since I have a bunch of Meyer lemons, I used one of those.)
- 1 large separated into yolk and white
Ingredients for Pie Crust using Chebe All-Purpose Bread Mix:
- 1 box of chebe all-purpose bread mix
- 2 eggs, scrambled
- 2 TBSP of olive oil
- 3 TBSP water (and a little extra if dry)
- NOTE: I DO NOT use cheese in the crust.
Supplies:
- Rolling pin
- pot for boiling
- pan for sauteing
- wooden spoon for stirring
- parchment paper
Directions for Filling:
- Preheat over to 375*F.
- Over high heat, bring chard leaves and stems to a boil in a pot of water. When it reaches a boil, simmer for just a few minutes until they’re wilted.
- While the chard is boiling, in another pan, saute onions and garlic in olive oil over medium-high heat until onions soften. About 2 minutes or so. I like to cook mine a little longer so some caramelize.
- Remove chard from water and squeeze out as much liquid as possible. Add to saute pan along with the artichokes and chili pepper flakes.
- Saute until everything is warmed through, about 3 minutes or so.
- Remove from heat and add to pan cheese, egg yolk, lemon juice, and salt and pepper. (You could do this separately in another bowl, but I thought, why dirty another dish!!)
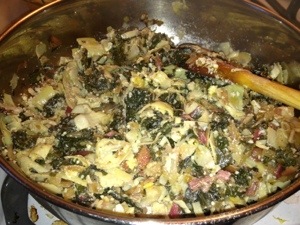
Chard Mixture with all Ingredients Mixed In
- Grease pie plate well. I just rubbed olive oil on the bottom of it.
- With your pie dough, split it in half and roll out 1/2 between 2 pieces of parchment paper. (See instructions below). Remove the top sheet of parchment paper and place pie plate upside down over the crust. Together, flip the pie plate and the crust over. Then slowly remove the parchment paper.

Rolled out Dough
- Place the chard mixture on top of the pie crust.
- Then, roll out the other 1/2 of the pie crust. Remove the top parchment sheet, and carefully turn it over and place it on top of the pie.
- Pinch the top and bottom crust together as best as you can.
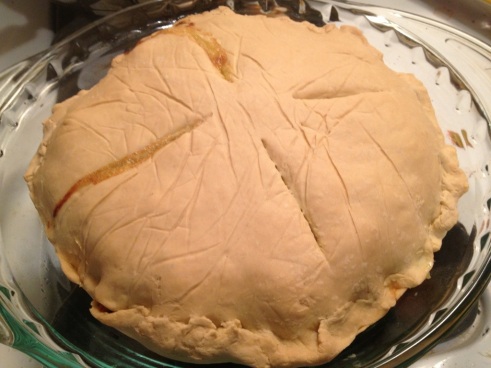
- Use the egg white mixed with 1 tsp of water. Brush on top of the pie. (I forgot to do this, but it’s why mine is not shiny).
- Cut at least 4 vent holes in the top of the pie.

Sides Pinched, Holes Made
- Bake for about 30 minutes. (Confession. . . I wasn’t really paying attention to how long I cooked it. I just kept checking on it. So, if you make this, let me know how long you cooked it for. I just needed the crust to be cooked through.)
Cooked Swiss Chard – Artichoke Pie


Directions for Pie Crust:
- Mix all wet items in bowl – eggs, oil, and water. I use a fork for the whole crust until I “knead” my hands 🙂
- Add the dry mixture, and continue to use the fork, pushing it down and scraping it across the liquid until it gets clumpy.
- At this clumpy point, I stick my hands in and keep kneading it until it is super smooth. If done right, it should not be sticky at all. It only gets sticky when too much water is added, so err on the side of caution. If after about 2-3 minutes of kneading, it is not coming together, add just a tiny bit more water, but do no use as much as a tablespoon.
- Split the dough in half, and put one half between 2 pieces of parchment paper. Roll out until it is a bit wider in diameter than your pie plate, because you want it to come up the sides.
- Slowly removed the top parchment paper and put the greased pie plate upside down, over it. Together, flip them over.
- Do the same process in #4 for your 2nd half of the dough.

Inside of DELICIOUS Chard and Artichoke Pie
It was truly amazing, and my daughter ate the whole thing!!! You can also try to make this as little appetizers, by making it in individual muffin tins.


